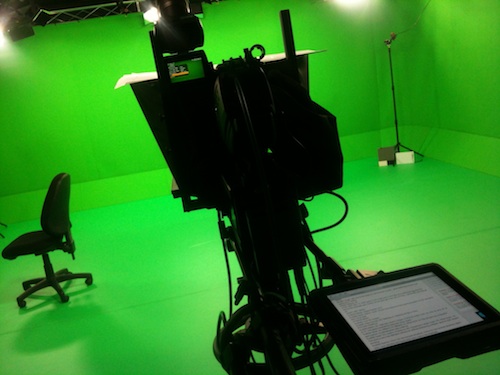
Virtual Studio
These are the setting adjustments that differ from the default....
CAMERA SET MENU:
Gain Setup: use -3/0/6 as defaults, preferably shooting with 0 where possible, -3 gives just 90IRE
Shutter: Angle: 180 (this is the angle of a filmcamera's shutter - given 25fps that comes to an exposure of 1/50th)
Filcker Reduce: off
TLCS: AGC limit: 12, AGC point: F/2.8, A.Sht point: F/5.6 (this all is limiting the iris aperture versus the automatic gain control, so we don't get lower dan a F/5.6) - i personally use manual iris.
LCD/FV SET MENU:
Marker: Aspect Select: 14:9
Zebra: Zebra-1 level: 70 (our over-exposure early-warning-system for the caucasian skin), show both
OTHERS MENU:
i.Link I/O: Enable
Video Format: HQ 1080/24p or 1080/25p (NTSC or PAL)
PICTURE PROFILE:
Matrix: On, High-Sat, Level 0, Phase -5, R-G 75, R-B 0, G-R -18, G-B -23, B-R -27, B-G 13. This gives a beautifully balanced colour matrix.
White: on, Offset A +2, Offset B +2, Offset ATW +2. This will give you a beautiful warm picture, by elevating the reds a little bit
Detail: On, Level 0, Frequency +65, Crispening 0, Black limiter +75, White limiter +75. This gives a very nice definition without the artificial sharpening artifiacts. Ideal for DOF adapter shooting.
Gamma: Cine-1 for rich-contrast situations, Cine-3 for low-contrast situations. Make cine-1 your standard and avoid cine-4 (too noisy in the shadows).
Black: -3 or -4 Black gamma: -2. Will help to reduce noise in the blacks.
The following settings are meant to mimic the film look.
Camera settings suggestions (only mentioning settings that differ from the default):
CAMERA SET MENU:
Gain Setup: use -3/0/6 as defaults, preferably shooting with 0 where possible, -3 gives just 90IRE
Shutter: Angle : 180 (this is the angle of a filmcamera’s shutter – given 25fps that comes to an exposure of 1/50th)
Filcker Reduce: off
TLCS: AGC limit: 12, AGC point: F/2.8, A.Sht point: F/5.6 (this all is limiting the iris aperture versus the automatic gain control, so we don’t get lower dan a F/5.6) – i personally use manual iris.
LCD/FV SET MENU:
Marker: Aspect Select: 14:9
Zebra: Zebra-1 level: 70 (our over-exposure early-warning-system for the caucasian skin), show both
OTHERS MENU:
i.Link I/O: Enable
Video Format: HQ 1080/24p or 1080/25p (NTSC or PAL)
Matrix: On, High-Sat, Level 0, Phase -5, R-G 75, R-B 0, G-R -18, G-B -23, B-R -27, B-G 13. This gives a beautifully balanced color matrix.
White: on, Offset A +2, Offset B +2, Offset ATW +2. This will give you a beatiful warm picture, by elevating the reds a little bit
Detail: On, Level 0, Frequency +65, Crispening 0, Black limiter +75, White limiter +75. This gives a very nice definition without the artificial sharpening artifiacts. Ideal for DOF adapter shooting.
Gamma: Cine-1 for rich-contrast situations, Cine-3 for low-contrast situations. Make cine-1 your standard and avoid cine-4 (too noisy in the shadows). Use Joe’s Levels plugin for FCP to enhance contrast in post.
Black: -3 or -4 (use the Adobe OnLocation waveform monitor or another soft- or hardware level monitor, then cap the lens, set camera to Gain-0 and you’ll see that only -3 produces the correct black level – lower will crush the blacks. It’s better to control the blacklevel per-scene in post. -4 will give you zero pedestal; giving you a tiny bit more headroom.
Black gamma: -2. Will help to reduce noise in the blacks.
Thanks to Marvelfilm and joshrockman from these profiles